This Natural Toner Recipe Is the Best Thing I’ve Tried for My Skin
Imagine your skin soaking up a refreshing elixir that balances, hydrates, and soothes all at once. That’s exactly what a good toner can do for you. If you’ve been searching for a solution to enhance your skin’s texture and radiance, this natural toner recipe could be the answer. With its blend of witch hazel, rose water, and aloe vera, you might just find the perfect addition to your skincare routine. Curious about how to make it?
Key Takeaways
- This natural toner effectively removes impurities and balances skin’s pH, ensuring optimal skin condition.
- Key ingredients like rose water and witch hazel hydrate, soothe, and tighten pores for a radiant complexion.
- The DIY toner is easy to make, using simple ingredients for maximum skin benefits and customization.
- Regular use enhances absorption of moisturizer, keeping skin hydrated and refreshed throughout the day.
- Users report improved skin texture, reduced breakouts, and a subtle glow with consistent application.
The Importance of Toner in Skincare
Toner plays a crucial role in your skincare routine, acting as a bridge between cleansing and moisturizing. It helps remove any leftover impurities and balances your skin’s pH, preparing it for the next steps. Incorporating a DIY toner can be both fun and rewarding; you get to customize it to your skin’s needs. Whether you choose witch hazel for its astringent properties or rose water for hydration, making your own toner ensures you’re using natural ingredients without harmful chemicals. This simple addition can enhance your skin’s overall health, leaving it refreshed and ready to absorb your moisturizer effectively. Additionally, using a simple natural toner can significantly improve skin texture and appearance, contributing to a more radiant glow.
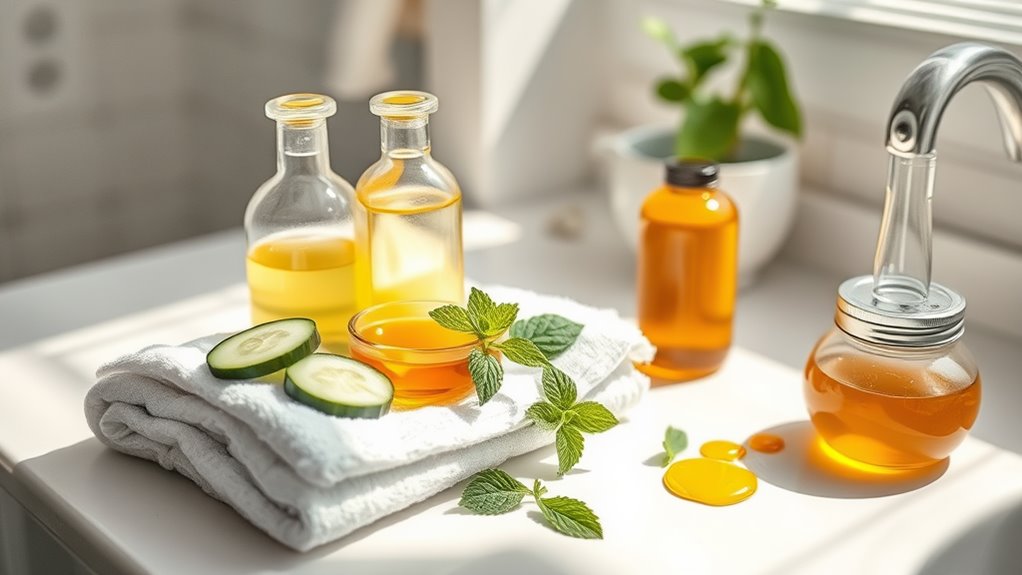
Key Ingredients for a Natural Toner
Creating a natural toner means selecting ingredients that cater to your skin’s unique needs.
For a refreshing boost, consider using rose water, which hydrates and soothes.
If you’re battling oiliness, witch hazel’s a fantastic choice, tightening pores and reducing shine.
Aloe vera gel offers calming properties, perfect for sensitive skin.
For a vitamin C kick, add green tea, known for its antioxidant benefits.
Lemon juice can brighten your complexion, but use it sparingly to avoid irritation.
Lastly, essential oils like lavender or tea tree can enhance your toner while providing additional skin benefits.
Choosing the right ingredients can significantly improve your skincare routine, resulting in radiant, balanced skin!
Step-by-Step Guide to Making Your Toner
Now that you know the key ingredients for your natural toner, it’s time to put them to work.
You’ll find that making your toner is simple and rewarding, and I’ll guide you through each step.
Let’s get started on mixing your refreshing blend that your skin will love! Additionally, using a DIY herbal formulation can lead to improved skin health and a noticeable glow that many users have experienced.
Essential Ingredients Needed
To craft your own natural toner, you’ll need a few essential ingredients that can elevate your skincare routine. Each component plays a crucial role in nourishing and refreshing your skin. Here’s a quick overview:
| Ingredient | Benefits | Quantity |
|---|---|---|
| Witch Hazel | Reduces inflammation | 1/2 cup |
| Rose Water | Hydrates and balances skin | 1/2 cup |
| Essential Oil | Adds fragrance and properties | 5-10 drops |
| Aloe Vera Gel | Soothes and heals | 2 tablespoons |
Gather these ingredients, and you’ll be ready to create a toner that’s perfect for your skin!
Simple Mixing Instructions
Mixing your natural toner is a breeze and only takes a few simple steps.
Follow this easy guide to create your refreshing blend:
-
Gather ingredients: Ensure you have all essential components ready.
-
Combine liquids: In a clean bowl, mix equal parts of your chosen base (like witch hazel) and water.
-
Add extras: Stir in a few drops of essential oils or a splash of apple cider vinegar for added benefits.
-
Transfer: Pour your mixture into a sterilized bottle for easy application.
Now you’re all set to enjoy your homemade toner that nourishes and revitalizes your skin!
How to Incorporate Toner Into Your Routine
Incorporating toner into your skincare routine can elevate your glow and enhance the effectiveness of other products. You’ll want to know the best time to apply it for maximum benefits, whether you prefer DIY options or store-bought alternatives, and how to layer it seamlessly with your favorite serums and moisturizers. Utilizing natural ingredients in your toner can further amplify its benefits and nourish your skin. Let’s explore these essential points to help you achieve that radiant complexion you’ve been aiming for.
Best Time to Apply
When’s the best time to apply toner in your skincare routine?
To maximize its benefits, consider these four key moments:
- After Cleansing: Use toner immediately after cleansing to remove any remaining impurities and prepare your skin.
- Before Moisturizing: Applying toner before your moisturizer helps enhance absorption and hydration.
- Midday Refresh: Spritz toner onto your face during the day for a quick refresh and boost of hydration.
- Post-Workout: Cleanse and tone your skin after exercise to remove sweat and impurities, keeping your complexion clear.
Incorporating toner at these times elevates your skincare game!
Layering With Other Products
After you’ve established the best times to apply toner, the next step is figuring out how to layer it with other products in your skincare routine. Start by applying toner right after cleansing to prep your skin for what comes next. Follow up with serums and moisturizers to lock in hydration.
| Step | Product Type | Purpose |
|---|---|---|
| 1 | Toner | Balance and hydrate |
| 2 | Serum | Target specific skin concerns |
| 3 | Moisturizer | Seal in moisture and protect |
This layering technique enhances absorption and maximizes your skincare benefits!
DIY vs. Store-Bought Options
Wondering whether to whip up a DIY toner or grab a store-bought option?
Both have their perks, but your choice depends on your skin’s needs.
Here’s a quick rundown:
- Ingredients: DIY lets you choose natural ingredients, while store-bought may contain preservatives.
- Cost: DIY can be budget-friendly, but premium store brands might offer convenience.
- Customization: Tailor a DIY toner to your specific skin type, but store-bought options provide ready-to-use consistency.
- Time: DIY requires prep time; store-bought is quick and hassle-free.
Evaluate your priorities and you’ll find the perfect toner fit for your routine!
Personal Experience: Results and Observations
As you incorporate the natural toner into your skincare routine, you’ll likely notice a refreshing change in your complexion. Your skin may feel more balanced, with excess oil controlled and dry patches softened. You might spot a subtle glow that wasn’t there before, illuminating your face beautifully.
Many users, including yourself, might find that breakouts decrease as the toner tightens pores and removes impurities. Plus, the soothing properties can calm redness and irritation, leaving your skin feeling rejuvenated. Additionally, using homemade face masks can enhance the overall effectiveness of your skincare regimen, providing even more benefits.
Tips for Storing and Using Your Natural Toner
To ensure your natural toner stays effective and fresh, proper storage and usage are key.
Follow these tips for the best results:
- Keep it Cool: Store your toner in a cool, dark place to prevent degradation.
- Use a Dark Bottle: Opt for a tinted glass bottle to shield your toner from sunlight.
- Label It: Write the date of preparation on the bottle to track freshness.
- Shake Before Use: Gently shake the bottle before each application to mix the ingredients well.
Additionally, consider adding DIY rose oil to your skincare routine, as it’s known for its hydrating properties.
With these simple steps, you’ll maximize your toner’s benefits, keeping your skin radiant and refreshed.